How to install metal prints
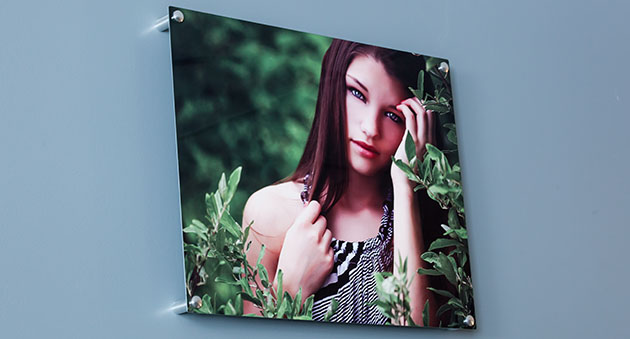
Congratulations on owning a metal print! These represent a new art medium for preserving photos by infusing dyes directly into specially coated aluminum sheets. Because the image is infused directly into the surface and not on it, your images will take on an almost magical luminescence. Printed on 1/8th in metal and held in place by 4 posts of high quality machined aluminum, it takes about 5-10 minutes to install in your home.
Things you’ll need.
- Philips screwdriver
Hammer
Level
Pencil
Drill with 1/8th bit for countersink

Find a nice spot for your shiney things to go
Find where you’d like to have your print mounted. For our purposes we’re mounting ours above a couch where it’s right at eye level yet just out of reach of kids standing on the couch.

The way things will look like inside your wall
*Tip. Steps 1-3 are demonstrating what will happen once you have the plastic hardware inside the wall. Don’t actually do this on your desk. :p Aluminum is soft metal so be very careful not to scratch it before it’s on the wall! Unwrap posts and carefully unscrew and set to the side.

It’s helpful to have two people for this part
Once you have the mounting spot picked out, place metal print against wall. Use your level to make sure it’s not crooked! While pressing it against the wall, use the pencil to mark 4 dots where each screw is supposed to go. Take the print down and stare at your dots you just made to make certain that’s where you want it hung.
If using drill, drill your pilot holes where you marked the 4 dots. Take plastic pieces and insert into the holes. You may need to use the hammer to pound it in. Make sure plastic is flush with wall and not sticking out! Hold post over plastic and screw it onto wall (you’ll notice the bottom of the posts has a hole in it so you can screw right through it to hold it tight on the wall!)

Almost done!
Now that all posts are snug on wall, place metal print on it. Take the aluminum finishing screws that were originally in the posts and screw them in (see steps 8-9). DO NOT OVER TIGHTEN
*Tip When threading in the finishing screws, be very careful to make sure everything is lined up properly. It is easier to strip than the brass or steel you’re probably used to working with so be careful.